

Cumulus
Cette page n'est pas encore disponible dans cette langue.
Please note that Cumulus will no longer be updated by the author. Therefore, it is recommended to switch to the new Cumulus MX, which features native support for Weathercloud.
Linking instructions
- Download the add-on file by clicking cumulus-weathercloud.zip
- Copy the files into a new folder inside your Cumulus installation folder (typically C:\Cumulus or C:\Program Files\Cumulus).
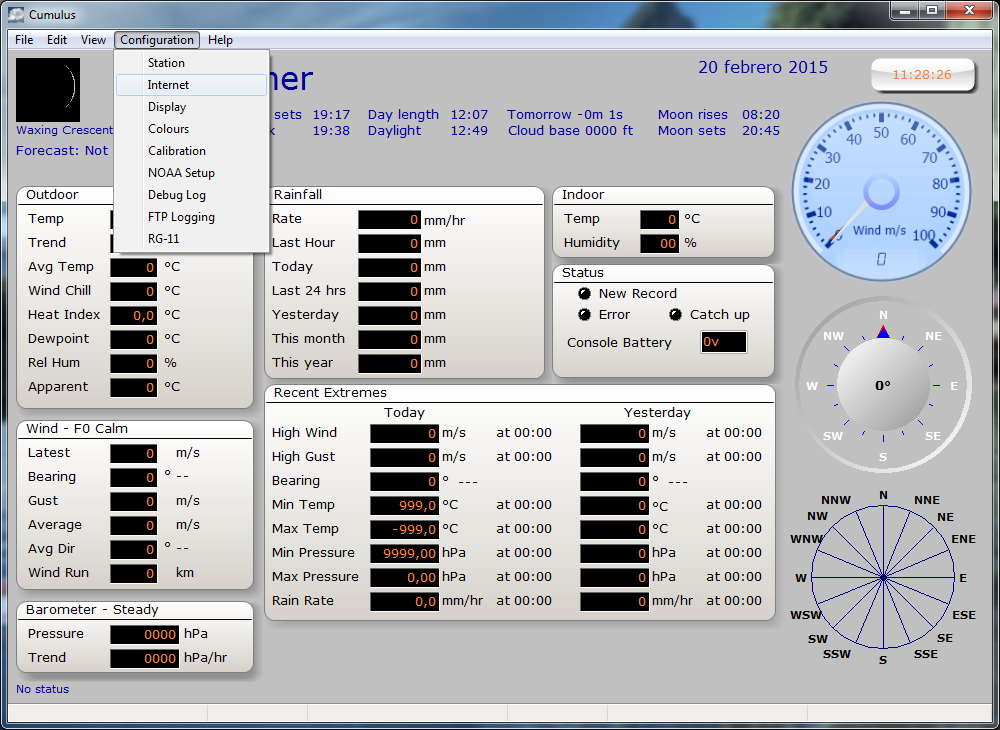
- Open Cumulus and click on Internet under the Configuration menu.
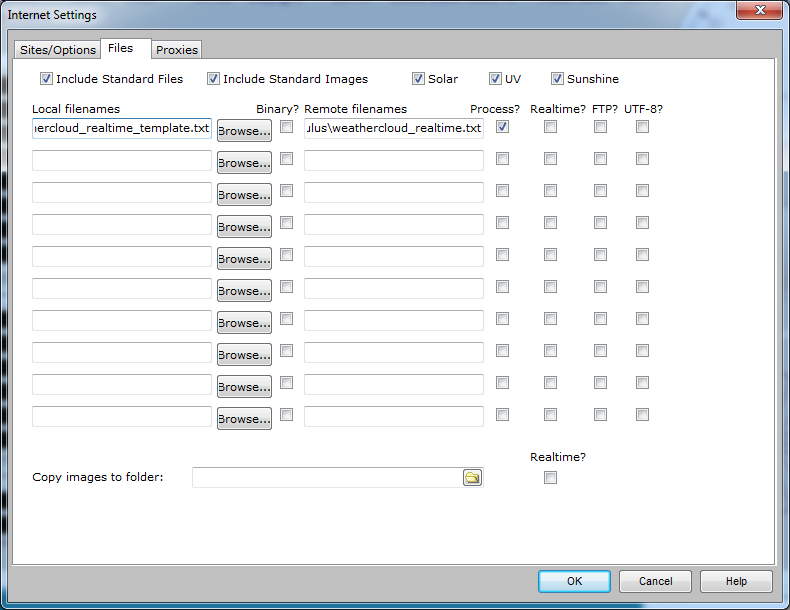
- Click on the Files tab and add the weathercloud_realtime_template.txt file. Set the remote file name to weathercloud_realtime.txt. Check the Process option and leave all other options unchecked. If your Cumulus logging interval is greater than 10 minutes, also check the Realtime option. Finally press OK.
- Open the weathercloud.ini file.
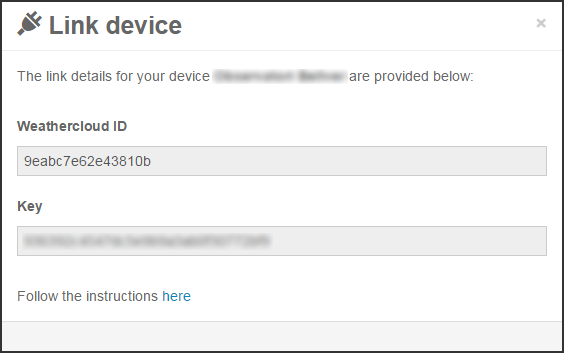
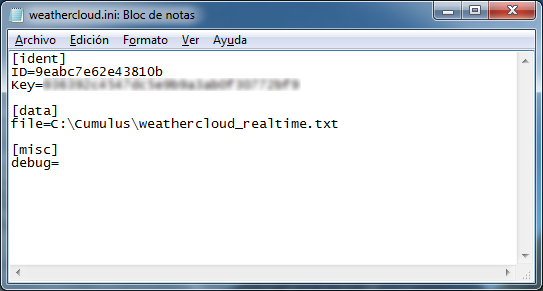
- Enter the Weathercloud ID and the Key provided for your device. You will find this information by going to your Devices page on Weathercloud and clicking on Link device in the Settings drop-down menu (the gear icon).
- Enter the remote file name and whether it is on a web server or not. This is either a file path to the local processed output file (typically C:\Cumulus\weathercloud_realtime.txt) or it is the URL to the same file on a web server (typically http://www.yourwebserver.com/weathercloud_realtime.txt). Save and close the file.
- Run the add-on program.
- If everything went right, your device should start uploading data within the next 10 minutes.
Suivez-nous sur les réseaux sociaux.